Recent Posts
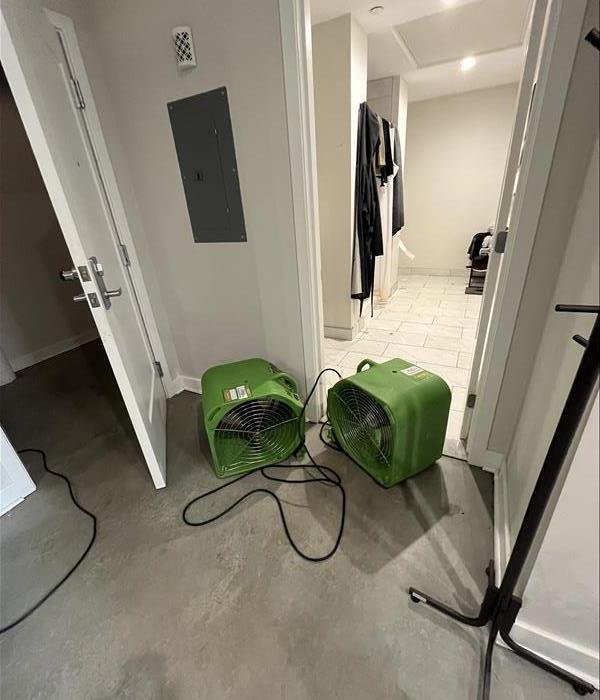
Understanding the Relationship Between Mold and Water Damage
7/10/2024 (Permalink)
 We explore the connection between mold and water damage and provide insights into how to address both issues effectively.
Mold and water damage often go hand in hand, creating a symbiotic relationship that can wreak havoc on homes and businesses. Understanding how mold thrives in damp environments and how water damage contributes to its growth is essential for effective prevention and remediation. In this blog post, we'll explore the connection between mold and water damage and provide insights into how to address both issues effectively.
The Role of Water Damage in Mold Growth
Water damage provides the ideal conditions for mold to flourish. Whether it's from a burst pipe, roof leak, or flooding, excess moisture can seep into building materials and create a breeding ground for mold spores. Here's how water damage contributes to mold growth:
Moisture Accumulation
Water damage leads to the accumulation of moisture in building materials such as drywall, wood, and insulation. This moisture creates the perfect environment for mold spores to germinate and multiply.
Poor Ventilation
Areas affected by water damage often have poor ventilation, further exacerbating the problem. Without adequate airflow, moisture becomes trapped indoors, increasing the likelihood of mold growth.
Organic Substrates
Water-damaged materials provide organic substrates for mold to feed on. As mold spores settle on damp surfaces, they begin to digest organic matter, breaking it down and spreading throughout the affected area.
Preventing Mold Growth in Water-Damaged Areas
Prompt Water Removal
The key to preventing mold growth after water damage is to remove excess moisture promptly. This may involve extracting standing water, drying out affected materials, and utilizing dehumidifiers to reduce indoor humidity levels.
Thorough Drying
Ensure thorough drying of water-damaged areas to prevent lingering moisture that could fuel mold growth. Use fans, heaters, and specialized drying equipment to expedite the drying process and mitigate the risk of mold contamination.
Mold Inhibitors
Consider applying mold inhibitors or antimicrobial treatments to water-damaged surfaces to prevent mold growth. These products can help inhibit the growth of mold spores and protect against future infestations.
Addressing Mold Growth in Water-Damaged Areas
Professional Inspection
If mold growth is suspected in water-damaged areas, it's essential to seek professional inspection and remediation services. Trained technicians can assess the extent of the mold problem, identify underlying moisture issues, and recommend appropriate remediation measures.
Mold Remediation
Professional mold remediation involves the safe and thorough removal of mold-contaminated materials. Specialized equipment and techniques are used to contain mold spores, remove affected materials, and restore the indoor environment to a clean and mold-free state.
Preventative Measures
Once mold remediation is complete, it's crucial to implement preventative measures to prevent future mold growth. This may include repairing leaks, improving ventilation, and maintaining indoor humidity levels within recommended ranges.
Mold and water damage share a symbiotic relationship, with excess moisture providing the perfect breeding ground for mold growth. By understanding the connection between mold and water damage and taking proactive measures to address both issues, homeowners and business owners can safeguard their properties against mold contamination and maintain a healthy indoor environment. If you're dealing with mold or water damage, don't hesitate to contact a professional restoration company like SERVPRO® for expert assistance.
Shielding Your Home: The Crucial Role of Proper Insulation in Preventing Water Damage
6/20/2024 (Permalink)
Water damage can wreak havoc on homes, causing structural deterioration, mold growth, and costly repairs. While external factors such as heavy rainfall and flooding contribute to water intrusion, the role of proper insulation in preventing water damage is often overlooked. In this blog, we'll delve into the critical role of insulation in safeguarding homes against water damage and explore how homeowners can ensure their insulation is up to the task of protecting their property.
Barrier Against Moisture
Proper insulation acts as a barrier against moisture infiltration, helping to prevent water from seeping into the home's interior. Insulation materials such as foam boards, spray foam, and fiberglass create a protective barrier that resists water penetration, keeping the interior of the home dry and free from water damage.
Reducing Condensation
In addition to preventing external moisture intrusion, insulation helps regulate indoor humidity levels and reduces condensation buildup. Condensation occurs when warm, moist air comes into contact with cold surfaces, leading to water droplets forming on walls, ceilings, and windowsills. Proper insulation helps maintain consistent indoor temperatures, minimizing condensation and the risk of water damage caused by excess moisture buildup.
Protecting Pipes and Plumbing
Insulation plays a crucial role in protecting pipes and plumbing fixtures from freezing temperatures and subsequent bursts. Properly insulated pipes are less susceptible to freezing, reducing the risk of pipe bursts and water damage. Insulating exposed pipes in attics, crawl spaces, and exterior walls helps maintain consistent temperatures and prevents water damage caused by frozen or burst pipes.
Preventing Roof Leaks
Roof insulation is essential for preventing roof leaks and water damage. Proper insulation in the attic helps regulate attic temperatures, reducing the risk of ice dams and snowmelt infiltration that can lead to roof leaks. Additionally, insulation helps prevent heat loss through the roof, minimizing the formation of ice dams and reducing the likelihood of water infiltration during winter months.
Enhancing Energy Efficiency
Beyond its role in preventing water damage, insulation contributes to overall energy efficiency and comfort in the home. Properly insulated homes require less energy for heating and cooling, reducing utility bills and environmental impact. By sealing gaps and reducing air leakage, insulation helps maintain consistent indoor temperatures, ensuring a comfortable living environment year-round.
Choosing the Right Insulation
Selecting the right insulation materials and installation methods is crucial for maximizing the effectiveness of your home's insulation. Consider factors such as R-value, moisture resistance, and compatibility with existing building materials when choosing insulation for your home. Consult with insulation professionals to determine the most suitable insulation options for your climate, budget, and specific needs.
Proper insulation plays a vital role in protecting homes against water damage, reducing energy consumption, and enhancing overall comfort and durability. By serving as a barrier against moisture infiltration, reducing condensation, protecting pipes and plumbing, preventing roof leaks, and enhancing energy efficiency, insulation helps safeguard homes from the devastating effects of water damage. Homeowners should prioritize proper insulation installation and maintenance to ensure their homes remain dry, comfortable, and resilient for years to come.
Spring Storm Survival Guide: Preparing Your Home for Nature’s Unpredictability
5/13/2024 (Permalink)
Spring, with its blossoming flowers and warmer temperatures, also brings the potential for unpredictable and sometimes severe weather. From thunderstorms to heavy rainfall, it's crucial to prepare your home for the challenges that spring storms can bring. Here's a comprehensive guide to help you fortify your home and weather the spring storms with confidence.
Create an Emergency Kit
Assemble an emergency kit that includes essential items such as non-perishable food, water, flashlights, batteries, a first aid kit, important documents, and any necessary medications. Keep this kit in a readily accessible and known location.
Establish a family emergency plan that outlines evacuation routes, designated safe areas within your home, and communication protocols. Ensure all family members are familiar with the plan and practice emergency drills.
Secure Outdoor Items
High winds are common during spring storms, so secure or bring indoors any outdoor items that could become projectiles. Patio furniture, grills, and other loose objects should be safely stored to prevent damage.
Ensure your gutters are free of debris to allow for proper drainage during heavy rainfall. Clogged gutters can lead to water damage and contribute to flooding, so clean them regularly, especially before the stormy season.
Trim Trees and Branches
Prune overhanging branches and trim trees to reduce the risk of falling limbs during strong winds. Clear dead or weak branches that may pose a threat to your home or power lines.
Inspect your roof for loose or damaged shingles. A well-maintained roof is crucial for preventing leaks during heavy rain. Address any issues promptly to avoid water damage.
Seal Windows and Doors
Ensure windows and doors are properly sealed to prevent water infiltration. Weatherstripping and caulking can help create a watertight seal and enhance energy efficiency.
If you live in an area prone to severe storms, consider installing storm shutters to protect windows from high winds and flying debris. Alternatively, pre-cut plywood panels can be used to board up windows.
Check Sump Pump Functionality
If you have a basement, ensure your sump pump is in good working condition. Test it regularly to ensure it can efficiently handle excess water and prevent basement flooding.
Ensure your heating, ventilation, and air conditioning (HVAC) system is functioning correctly. Clean or replace air filters, and consider investing in a surge protector to safeguard the system against power surges.
Keep important documents, such as insurance policies, identification, and medical records, in a waterproof container. Store this container in a secure yet easily accessible location.
Install Surge Protectors
Power surges are common during storms and can damage electronic devices. Install surge protectors to safeguard sensitive equipment like computers, televisions, and appliances. Keep a weather radio or a reliable weather app handy to stay informed about storm developments. Pay attention to weather alerts and heed evacuation warnings if necessary.
Have a backup power source, such as a generator, to keep essential appliances running during power outages. Stock up on batteries for flashlights and consider investing in a portable phone charger. Familiarize yourself with local evacuation routes and shelters. In case of severe storms or flooding, knowing where to go and how to get there can be crucial for your safety.
By implementing these measures, you can fortify your home against the challenges posed by spring storms. Preparation is key to minimizing potential damage and ensuring the safety and well-being of your family. Stay vigilant, stay informed, and be ready to weather the storm with confidence.
Harnessing the Power: A Guide to Safely Using and Storing Propane Tanks
4/15/2024 (Permalink)
Propane, a versatile fuel commonly used for heating, cooking, and powering various appliances, has become a staple in many households. While its benefits are undeniable, ensuring the safe use and storage of propane tanks is paramount. In this blog, we'll explore essential guidelines to help you harness the power of propane while prioritizing safety.
Choosing the Right Tank
Certification Matter
When purchasing a propane tank, ensure it is certified by a reputable regulatory body. Certification guarantees that the tank meets strict safety standards.
- Size Considerations
- Choose a propane tank size that suits your usage needs. Larger tanks are suitable for high-demand applications, while smaller ones are ideal for occasional use.
- Inspect for Damage
- Before use, inspect the propane tank for any signs of damage, such as dents, rust, or visible wear. Damaged tanks should not be used and must be replaced.
Safe Handling Practices
- Transportation Precautions
- When transporting propane tanks, ensure they are secured in an upright position. Use a well-ventilated vehicle and avoid leaving tanks in a closed car.
- No Smoking Zone
- Smoking near propane tanks is a strict no-no. Always maintain a safe distance and prohibit smoking in areas where propane is being used or stored.
- Proper Connection
- When connecting a propane tank to an appliance, follow the manufacturer's instructions carefully. Use appropriate tools and ensure the connections are tight and leak-free.
Storage Guidelines
Outdoor Storage
- Propane tanks should be stored outdoors in well-ventilated areas. Never store them in enclosed spaces like basements or sheds.
- Secure Placement
- Store propane tanks in an upright position on a flat, stable surface. Avoid placing them near flammable materials or ignition sources.
- No Hot Zones
- Keep propane tanks away from direct sunlight and heat sources. Exposure to high temperatures can increase internal pressure and pose a safety risk.
Emergency Preparedness
- Emergency Shut-Off
- Familiarize yourself with the emergency shut-off valve on your propane tank. In case of an emergency, knowing how to quickly shut off the supply is crucial.
- Regular Checks
- Conduct regular checks for leaks using a propane leak detector solution or soapy water. If bubbles appear, it indicates a leak, and the tank should be addressed immediately.
Disposal and Maintenance
- Professional Inspections
- Schedule professional inspections for your propane system regularly. Certified technicians can identify potential issues and ensure the system's safety.
- Proper Disposal
- When a propane tank reaches the end of its life cycle, consult local guidelines for proper disposal procedures. Avoid disposing of tanks in standard waste streams.
Safely using and storing propane tanks is a responsibility that comes with the benefits of this versatile fuel. By adhering to these guidelines, you can enjoy the convenience of propane while minimizing potential safety risks. Whether you're cooking up a storm on the grill or keeping warm by a propane-fueled heater, following these practices ensures a safer and more enjoyable experience with this valuable energy source.
Unraveling the Mystery of Mold in Insulation: Strategies for Detection and Remediation
3/6/2024 (Permalink)
Insulation plays a crucial role in maintaining a comfortable and energy-efficient home. However, when mold infiltrates this hidden layer, it can pose challenges to both the insulation itself and the overall well-being of your living space. In this blog, we'll explore effective strategies for detecting and remediating mold in insulation without discussing health concerns.
Detecting Mold in Insulation
Mold often emits a distinct musty odor. If you notice unpleasant smells in your home, especially in areas with insulation, it could be a sign of mold presence.
Inspect visible portions of insulation for any discoloration. Mold may appear as dark spots, irregular patterns, or fuzzy growth on the surface.
Water stains, leaks, or signs of water damage near insulation are red flags. Moisture provides an ideal environment for mold growth within insulation layers.
Consider external factors such as roof leaks, plumbing issues, or faulty gutters. These problems can contribute to water intrusion and mold growth within insulation.
Remediation Strategies
Begin by isolating the areas with mold-infested insulation. This prevents the spread of mold spores to unaffected parts of the home.
- Remove and Discard Contaminated Insulation:
In cases of extensive mold growth, it may be necessary to remove and discard the contaminated insulation. This prevents further mold development and ensures a fresh start.
Clean the surrounding areas, including the framework and adjacent surfaces, to eliminate any remaining mold spores. Use mold-killing solutions to disinfect the affected space.
- Address Underlying Causes
Identify and address the root causes of mold growth, such as leaks or water intrusion. Fixing these issues is crucial to preventing future mold infestations in insulation.
Enhance ventilation in the affected areas. Good airflow helps to keep the environment dry and reduces the likelihood of mold recurrence.
- Apply Mold-Resistant Coatings
Consider applying mold-resistant coatings on the surfaces surrounding insulation. These coatings act as a protective barrier, discouraging mold growth.
Install Vapor Barriers
Install vapor barriers in areas prone to moisture. Vapor barriers help control humidity levels and prevent moisture from reaching the insulation.
Regularly monitor humidity levels within your home. Maintaining optimal humidity prevents the conditions that favor mold growth in insulation. For extensive mold infestations or cases where insulation replacement is necessary, consider hiring professionals with expertise in mold remediation. Implement preventative measures, such as regular home inspections, prompt repairs of leaks, and ongoing maintenance, to minimize the risk of mold returning to insulation.
Detecting and remediating mold in insulation requires a proactive approach. By identifying signs of mold early on and taking swift remedial actions, you safeguard the integrity of your insulation and contribute to a healthier home environment. Regular maintenance, addressing underlying causes, and promoting proper ventilation are key components in ensuring your insulation remains mold-resistant. Through these measures, you can enjoy the benefits of efficient and uncontaminated insulation in your home.
Dripping Disasters: Achieving Financial Preparedness for Water Damage Emergencies
2/7/2024 (Permalink)
Unforeseen water damage emergencies can wreak havoc on your finances if you're not prepared. From burst pipes to flooding, the financial implications can be overwhelming. In this blog post, we will discuss the importance of financial preparedness for water damage emergencies and explore practical steps to safeguard your finances in such situations.
Building an Emergency Fund
One of the key pillars of financial preparedness is establishing an emergency fund. Set aside a portion of your income specifically for unforeseen emergencies like water damage. Aim to accumulate at least three to six months' worth of living expenses to cover any unexpected expenses that may arise.
Reviewing Insurance Coverage
Thoroughly review your insurance policies, including homeowner's insurance or renter's insurance, to understand what types of water damage they cover. Consider adding additional coverage, such as flood insurance, if you live in an area prone to flooding. Understand the deductibles and limits of your policies to ensure you have appropriate coverage for water damage emergencies.
Regular Home Maintenance
Prevention is key when it comes to protecting your finances from water damage emergencies. Regularly inspect and maintain your home, ensuring that plumbing systems, roofing, gutters, and drainage are in good condition. By identifying and addressing potential issues early on, you can minimize the risk of extensive water damage and reduce the financial impact.
Understanding Liability and Responsibilities
Knowing your liability and responsibilities in the event of water damage emergencies is crucial. Understand whether you or your landlord is responsible for certain types of repairs or damages. Review your lease agreement or condominium association rules to determine who should bear the financial burden in specific situations.
Seeking Professional Assistance
Engaging the expertise of restoration professionals can help mitigate the financial impact of water damage emergencies. They can accurately assess the extent of the damage, provide cost estimates for restoration, and guide you through the insurance claims process. Prompt action and professional assistance can minimize the financial strain associated with water damage emergencies.
Documenting and Prioritizing Restoration Expenses
In the aftermath of a water damage emergency, document all expenses related to mitigation, restoration, and replacement. Keep copies of receipts, invoices, and estimates for insurance claims and tax purposes. Prioritize expenses based on urgency and budget constraints, balancing the need for immediate restoration with long-term financial stability.
Water damage emergencies can be financially taxing if you're not prepared. By building an emergency fund, reviewing insurance coverage, maintaining your home diligently, understanding liability, seeking professional assistance, and documenting expenses, you can achieve financial preparedness to navigate the financial challenges that water damage emergencies may bring.
Defend Your Roof: Preventing Ice Dams and Roof Leaks After a Storm
1/16/2024 (Permalink)
As winter storms blanket the landscape, the threat of ice dams and roof leaks looms large. These unwanted visitors can wreak havoc on your home, causing structural damage and potentially costly repairs. In this blog, we'll explore proactive measures to shield your roof from ice dams and prevent leaks, ensuring your home remains a warm and dry haven even in the coldest of seasons.
Understanding the Culprits: Ice Dams and Roof Leaks
Before we delve into prevention strategies, let's understand the two main adversaries: ice dams and roof leaks.
- Ice Dams: Ice dams form when melted snow refreezes at the edge of your roof. As this process repeats, it creates a barrier, preventing proper drainage and causing water to pool behind the dam.
- Roof Leaks: Ice dams, combined with heavy snowfall or freezing rain, can compromise your roof's integrity. The trapped water seeks alternative routes, often finding its way through gaps, cracks, or damaged shingles, leading to leaks inside your home.
Prevention Strategies: Guarding Against Ice Dams and Roof Leaks
- Gaps, cracks, and openings in your roof can provide easy access for water. Regularly inspect and seal these entry points to fortify your roof against leaks. Pay attention to areas around chimneys, vents, and skylights.
- Gutter Maintenance:
- Clean gutters are essential for effective water drainage. Remove debris regularly to prevent blockages that can contribute to ice dam formation. Consider installing gutter guards to minimize the risk of clogs.
- Snow Removal:
Safely removing excess snow from your roof can be an effective preventive measure. Use a roof rake or hire professionals for snow removal to reduce the weight on your roof and minimize the potential for ice dams.
Installing heat cables along the roof's edge can help melt snow and ice, preventing the formation of dams. Consult with professionals to ensure proper installation and usage.
Ice Dam Prevention Products
Invest in ice dam prevention products, such as roof membranes and ice shields. These barriers provide an additional layer of protection against water intrusion, especially in vulnerable areas.
- Professional Roof Inspection:
Schedule regular roof inspections by professionals. They can identify potential weaknesses, damaged shingles, or areas that may be prone to leaks. Addressing issues proactively can prevent more extensive damage later.
Installing attic warmers or heat lamps can help regulate the temperature in your attic. Be cautious with their use, ensuring they are installed safely and don't pose a fire hazard.
Keep indoor humidity levels in check. Excessive indoor humidity can contribute to ice dam formation. Use dehumidifiers if necessary, especially during the winter months.
- Insulate Recessed Lights:
Recessed lights in your ceiling can be sources of heat loss. Insulate them properly to minimize warm air rising into the attic, which can contribute to the melting and refreezing cycle.
Address any roof damage promptly. Damaged or missing shingles, as well as compromised flashing, can create vulnerabilities that allow water to penetrate. Timely repairs ensure your roof remains a strong barrier against the elements.
Preventing ice dams and roof leaks is a proactive effort that pays off in the long run. By fortifying your roof with insulation, ventilation, and regular maintenance, you create a formidable defense against the winter's icy challenges. Stay vigilant, implement these preventive measures, and ensure your home remains warm, dry, and resilient even in the face of the coldest storms.
Fire Prevention 101: Safeguarding Your Garage from Potential Fires
11/21/2023 (Permalink)
Garages are often filled with flammable materials and equipment, making them a common location for fires to start. However, with proper precautions and proactive measures, individuals can significantly reduce the risk of garage fires. In this blog, we will discuss effective strategies and preventive steps to keep your garage safe and minimize the chances of a fire breaking out.
Proper Storage and Organization
Keeping your garage well-organized is crucial. Ensure that flammable substances such as gasoline, paint thinner, and propane tanks are stored in approved containers and away from ignition sources. Avoid overcrowding the space, as it can create a fire hazard and restrict access in case of an emergency.
Regular Maintenance
Conduct regular maintenance of electrical components in your garage. Inspect and replace damaged or frayed cables, cords, and plugs. Keep an eye out for warning signs such as flickering lights, unusual odors, or sparking outlets, and address them promptly. Additionally, schedule regular inspections of your garage door opener to ensure it is in proper working condition.
Adequate Ventilation
Proper ventilation is essential to prevent the build-up of heat and flammable fumes. Ensure your garage has sufficient ventilation, such as vents or windows, to allow for the circulation of fresh air. Adequate airflow helps dissipate any potential flammable vapors that may be present.
Fire-Safe Appliances
When using appliances in the garage, ensure they are designed for garage use and have the appropriate safety features. For instance, choose appliances with automatic shut-off mechanisms or cool-down cycles to minimize the risk of overheating or accidental fires.
Safe Work Practices
Whether you are involved in DIY projects or automotive repairs, practicing safe work habits is crucial. Always work in a clean and clutter-free environment to minimize the risk of sparks igniting flammable materials. Use non-flammable drop cloths and mats to protect surfaces from sparks and spills.
Fire Safety Equipment
Equip your garage with essential fire safety equipment. Install a fire extinguisher in a visible and easily accessible location, preferably near the exit. Ensure you have a smoke detector installed, and regularly check its batteries to maintain its functionality. Consider installing a heat detector for areas prone to excessive heat or where flammable items are stored.
Educate Family Members
Educate your family members about fire safety in the garage. Teach them how to use fire extinguishers correctly, recognize the sound of smoke alarms, and understand the importance of reporting any signs of fire immediately.
Follow Electrical Precaution
Avoid overloading electrical outlets or using extension cords as permanent wiring solutions. Unplug appliances when not in use, and refrain from daisy-chaining multiple appliances to a single power strip. These practices help reduce the risk of electrical malfunctions and subsequent fires.
Remember, prevention is key when it comes to addressing the risk of garage fires. By implementing the above measures and adopting a proactive approach to fire safety in your garage, you can mitigate potential hazards and ensure the well-being of your home and loved ones. Stay vigilant, regularly review your fire prevention strategies, and seek professional advice where necessary to maintain a secure and fire-free garage.
Handling Water Damage During Home Renovations: Tips to Minimize and Address Unexpected Water Issues
10/24/2023 (Permalink)
 Handling water damage during home renovations can be stressful.
Embarking on a home renovation project is an exciting time, but unexpected water damage can quickly turn your dreams into a nightmare. Whether you encounter a burst pipe, leaking roof, or plumbing mishap, it is crucial to handle water damage promptly to prevent further issues and protect your investment. In this blog post, we will provide you with tips and steps to help you effectively manage water damage during home renovations.
Prepare for the Unexpected
Budget for potential water damage: Include a contingency fund in your renovation budget to account for unexpected repairs, including water damage.
Inform your contractor: Communicate with your contractor about potential water damage risks, especially if you live in an older home or are renovating areas prone to leaks or plumbing issues.
Act Promptly
Shut off the main water supply: In the event of a burst pipe or significant leak, locate and shut off the main water supply immediately to minimize water damage. Protect your furniture, electronics, and other valuables by relocating them to a safe and dry area away from water damage.
Document the Damage
- Take photos and videos: Document the water damage thoroughly to provide evidence for insurance claims.
- Note details: Record the date, time, and extent of the damage for reference during restoration and insurance processes.
Assess the Situation
Determine where the water is coming from to address the cause and prevent further damage. It could be a plumbing issue, roof leak, or foundation problem.
Remove standing water using pumps, wet-dry vacuums, or professional water extraction services. Then, dry out the affected areas using fans, dehumidifiers, and open windows.
Hire Professionals
Consult water damage restoration experts: Water damage restoration professionals are trained to assess, mitigate, and repair water damage effectively. Seek their expertise to ensure thorough restoration and prevent future issues.
Address Underlying Issues
Once the water damage is under control, engage licensed professionals to address the underlying issues causing the water damage, whether it's plumbing repairs, roof fixes, or foundation work.
Take preventive measures to minimize future water damage risks, such as reinforcing waterproofing systems, installing gutter guards, or regular maintenance of plumbing and roof systems.
Communicate with Your Insurance Provider
Contact your insurance company as soon as possible to initiate the claim process. Provide the photos, videos, and details you captured to assist with your insurance claim.
Handling water damage during home renovations can be stressful, but a proactive and systematic approach can help minimize the impact and ensure a successful restoration process. By preparing for the unexpected, acting promptly, documenting the damage, seeking professional help, addressing underlying issues, and communicating with your insurance provider, you can navigate water damage challenges and continue your renovation journey with confidence. Remember, a well-executed response to water damage can turn a setback into an opportunity for improvement and create a safer and more resilient home in the long run.
Can Mold Grow After a Leak is Fixed?
10/24/2023 (Permalink)
Dealing with water leaks in your home can be a stressful experience, and it's crucial to address them promptly. One common concern is whether mold can continue to grow even after a leak is fixed. In this blog, we'll dive into the factors that can contribute to mold growth post-repair and what you can do to prevent it. Let's explore this topic to help you maintain a clean living environment in your Woburn, MA, home.
Understanding Mold Growth
Mold is a natural part of the environment, and its spores are everywhere, including the air inside your home. Mold spores can become problematic when they find suitable conditions for growth. The key factors that contribute to mold growth are moisture, warmth, and organic materials (such as wood, drywall, or fabric).
Mold and Water Leaks
Water leaks provide the ideal environment for mold growth. When a leak occurs, moisture is introduced into areas that are often hidden from view, such as within walls, under floors, or in ceilings. If these areas remain damp, it creates the perfect breeding ground for mold.
The Importance of Quick Repairs
Addressing water leaks quickly is essential in preventing mold growth. When leaks are fixed quickly and thoroughly, the moisture source is removed, and the conditions that favor mold growth are disrupted. However, even with timely repairs, mold can still develop if moisture was present for an extended period before the leak was discovered.
Hidden Moisture and Mold
One challenge homeowners face is identifying hidden moisture and mold growth. Mold can thrive in concealed areas for weeks or even months before becoming visible or producing noticeable odors. This is why it's crucial to not only fix the leak but also thoroughly dry and assess affected areas for potential mold growth.
Preventing Post-Repair Mold Growth
To prevent mold from growing after a leak is fixed, consider the following steps
- Thorough Inspection: After repairing the leak, conduct a thorough inspection of the affected area to check for any signs of moisture or mold.
- Proper Drying: Ensure that all affected materials are completely dried. Use fans, dehumidifiers, or professional drying equipment to expedite the drying process.
- Mold Remediation: If you suspect or discover mold growth, consult with mold remediation professionals like SERVPRO®. They have the expertise and equipment to safely and effectively address mold issues.
- Regular Maintenance: Implement a regular maintenance schedule for your home to catch potential leaks and moisture issues early.
- Improved Ventilation: Proper ventilation in areas prone to moisture, like bathrooms, basements, and kitchens, can help prevent condensation and reduce the risk of mold growth.
While fixing a leak is a critical step in preventing mold growth, it's not a guarantee that mold won't develop afterward. Mold can still thrive in concealed areas if moisture was present for an extended period. Prompt repairs, thorough drying, regular maintenance, and vigilance in monitoring hidden moisture are essential in preventing post-repair mold growth. If you suspect mold issues in your Woburn, MA home, don't hesitate to contact SERVPRO® of Burlington/Woburn for professional mold remediation services. Stay proactive, Woburn, and enjoy a mold-free living environment!


 24/7 Emergency Service